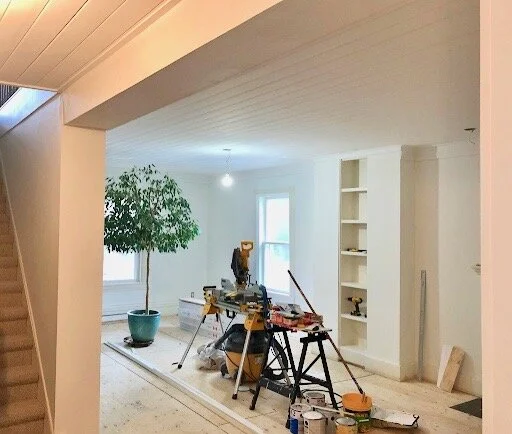
Dining Room DIY Tongue and Groove Ceiling


It’s true that once you renovate one area of the house, it’s a slippery slope towards another area!
Halfway through the kitchen renovation, we could see how the rooms were going to flow and realized that a long term goal of replacing the dining room floor and ceiling was moving up our priority list.
There were two issues: tying the new kitchen hardwood into the existing 1970’s dining room hardwood and addressing the popcorn stucco ceiling where, at some point in time, a wall dividing 2 rooms had been removed and patched.

Popcorn stucco ceiling patch line

The demolition was brutal!
The professionals tried to warn us it would be incredibly dirty, dusty and disruptive! We decided to tackle it as our major winter project.
One option would have been to install the tongue and groove boards on top of the existing drywall ceiling, but we suspected there were a couple of layers and we could gain some height, instead of losing it. In hindsight, it was worth it. There was a layer of drywall on top of the original lath & plaster ceiling. Everything had to come down so we could see what we were dealing with.


This was a perfect opportunity to have our electrician remove any remnants of knob & tube wiring and also to have our plumber replace some lines. We centred the chandelier electrical box and added in two pot-lights over the fireplace.
Interesting seeing the wall colours over the years and we gained about 3”! Next, we started installing!


The job was made more challenging by the fact that we were working with 12-16’ boards - we recommend working with shorter boards. In the end, we were really happy about gaining a few inches in ceiling height and the overall look of tongue & groove! A simple “cove moulding” trim and trim paint - Benjamin Moore Chantilly Lace, Pearl.

There were existing french doors that we re-painted and replaced the handles.

Of note was an original set of hinges we stripped and sprayed black. We also found 2 period Cast Iron Wall Grates at a cool store called B D Salvage in Hamilton again stripped and sprayed!


We just finished a few days before the hardwood installation date! The flooring was installed on time with all the ceiling mess behind us! We kept the original baseboard moldings and just freshened them up with BM Chantilly Lace.

This was a massive job but we are so happy with the results. The continuity of the ceiling and flooring make the flow into the new addition of the house much more smooth.